


Tonight for my Women’s Study Group, my friend Julie and I took our turn to bring eats for everyone, while we also got “food for the soul.” After a quick catch up call with Julie (she is also an event planner from San Diego – (yes, I know…what are the chances that we would meet and be fast friends?) we decided on a fall theme for a fun yet simple buffet. Here’s what we whipped up to bring to the table:

Brenda and Jessi:
- caramel apples
- tea and cider with hot water
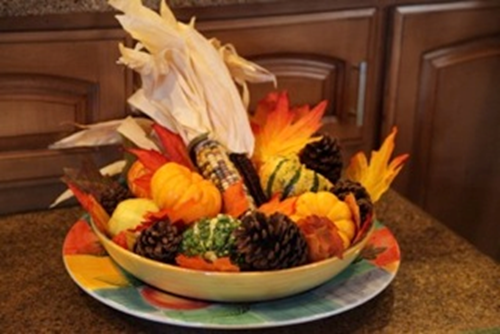
- centerpiece and table cloth
- chili bowls and spoons
- veggies with dip (in a cute sparkle pumpkin!)
Julie brought:
- extra chili from what she was already making on Sunday
- mini cornbread from the local market to go with chili
- already had some cute fall napkins and plates to bring
As an added bonus – our turn is done until December. So why not put a few fall touches together for the girls?
So, we absolutely LOVE Rachel Ray’s magazine, Everyday with Rachel Ray. We were browsing through our newest issue, and got inspired by her recipe for DIY Caramel Apples, as well as her price comparison if you prefer to purchase already made ones. Who doesn’t LOVE caramel apples? Check out her recipe HERE! Now, I have seen some people do some amazing things with sweets…but I’m not the best when it come to making confections, so we scored a really sweet find this year…Caramel Apple WRAPS! These caramel apple wraps took all the stress out of making an awesome dessert/snack for the girls at the study group.
You simply start with fresh, clean granny smith apples and open up the wraps…then preheat your oven to 200 degrees:

I ended up using the paper that came inside the wrap package instead of wax paper on the baking sheet to avoid anything melting. Plus, we were able to actually serve the apples on the SAME cookie sheet with saved us some time and turned out REALLY cute.

You peel each sheet from the paper, place the paper on the baking tray, and stretch the caramel slowly & gently to reach the corners of each apple:

Once you ‘ve got that part down, you place each apple on the baking sheet, but make absolutely sure NONE of the apples are too close to each other, or you’ll end up with them completely stuck together. I ended up some minor caramel malfunctions and having to re-space some of mine out to be safe.

Then, insert your popsicle sticks (they come in the package), let the apples hang out in the oven for about 5 minutes, and VIOLA!

Super simple, very quick to do, and the results were fantastic! My only words of wisdom on this little project would be: buy smaller/smallish apples to avoid bubbles in your caramel from being stretched too thin in the oven, and also make sure you STORE them in the fridge to keep them fresh before serving…BUT…take them out for about 30 minutes before you serve them so they soften up or someone might find them a bit chewy.
Alright…so we got our apples done, we then used some leftover cellophane bags from our OCC party favors, some saved raffia, and some yummy bulk tea and apple cider we got on sale to make these apples into something special.

We grabbed some plastic mugs we already had on hand, along with some of those great fall color napkins we stocked up on and a few of those great colorful leaves from the dollar store…and worked up a cute little mug display to go with our teas and ciders. We used plates from the kitchen and some cute taffy candy to add some flair!

Once we had that all squared away, we took just a few minutes…sliced up some leftover veggies from the fridge, and asked Chris to help us hollow out a sparkle pumpkin we had on hand from our fall decor to put some dip in. We used some carrots and zucchini cut into strips which were inexpensive and fresher than a plain veggie tray. One great entertaining tip: if you ever see things like dip-mixes or relish items like canned olives on sale…STOCK UP! You never know when you might need to do a quick appetizer on the go. We used some great dips from Harvest Festival, cut the edge off a little plastic bowl…

…and filled our pumpkin with some delicious veggie dip that cost us nothing extra, thanks to what we had saved in the pantry…and looked pretty darn cute if we do say so ourselves!


Wow – I so love these pic’s. The dip filled gourd is a gem – I already have all the ingredients in the house. How great is that. And…..it’s healthy too. Bravo on this terrific idea. Just think……you could use a watermelon or a pineapple or an eggplant…..thanks for inspiring me to try new things – creative and easy – I love it!!!!